이전 포스팅에 이어서 이번에는 수정/조회 API를 만들어보겠습니다.
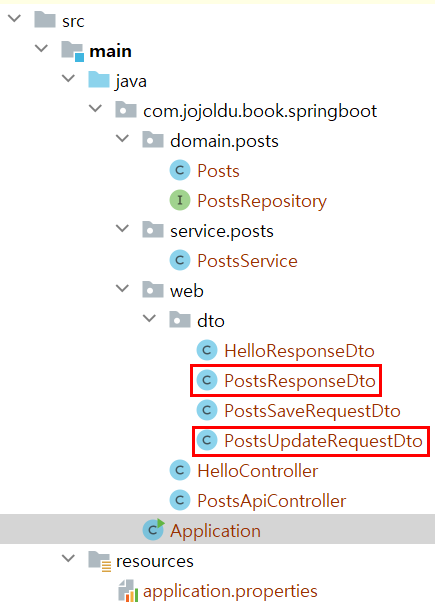
1. 먼저 다음과 같이 파일을 만들어주세요
2. Posts
public class Posts {
    //생략
    public void update(String title, String content){
        this.title = title;
        this.content = content;
    }
}
데이터를 수정하는 update메소드를 만들어줍니다. title과 content만 수정할 수 있도록 합니다
3. PostsUpdateRequestDto
@Getter
@NoArgsConstructor
public class PostsUpdateRequestDto {
    private String title;
    private String content;

    @Builder
    public PostsUpdateRequestDto(String title, String content) {
        this.title = title;
        this.content = content;
    }
}
@NoArgsConstructor - 기본 생성자를 추가해줍니다
@Builder - 이 클래스에 빌더패턴을 사용합니다
4. PostsResponseDto
@Getter
public class PostsResponseDto {
    private Long id;
    private String title;
    private String content;
    private String writer;

    public PostsResponseDto(Posts entity) {
        this.id = entity.getId();
        this.title = entity.getTitle();
        this.content = entity.getContent();
        this.writer = entity.getWriter();
    }
}
PostsResponseDto 생성자는 Entity를 받아 필드에 값을 넣습니다
5. PostsService
public class PostsService {
    //생략
    //수정
    @Transactional
    public Long update(Long id, PostsUpdateRequestDto requestDto) {
        Posts posts = postsRepository.findById(id)
                .orElseThrow(() -> new IllegalArgumentException("해당 게시글이 없습니다. id=" + id));
        posts.update(requestDto.getTitle(),requestDto.getContent());
        return id;
    }
    //조회
    public PostsResponseDto findById(Long id) {
        Posts entity = postsRepository.findById(id)
                .orElseThrow(() -> new IllegalArgumentException("해당 게시글이 없습니다. id=" + id));
        return new PostsResponseDto(entity);
    }
}
Posts posts = postsRepository.findById(id).orElseThrow(() -> new IllegalArgumentException("해당 게시글이 없습니다. id=" + id)); - id로 Posts객체를 찾아옵니다. id에 해당하는 Posts객체가 없을 경우 예외처리를 해줍니다
findById() - entity에 해당하는 PostResponseDto를 리턴해줍니다
6. PostsApiController
public class PostsApiController {
    //생략
    //수정
    @PutMapping("api/v1/posts/{id}")
    public Long update(@PathVariable Long id, @RequestBody PostsUpdateRequestDto requestDto) {
        return postsService.update(id, requestDto);
    }

    //조회
    @GetMapping("api/v1/posts/{id}")
    public PostsResponseDto findById(@PathVariable Long id) {
        return postsService.findById(id);
    }
}
@PutMapping("api/v1/posts/{id}") - 수정할 때 사용합니다. HTTP body에 담아서 보내줍니다
@PathVariable - 파라미터를 받는 방법 중 하나입니다. url에서 {}를 활용해 변수처럼 적어준 뒤 @PathVariable 어노테이션 뒤에 {} 안에 적은 변수명을 동일한 변수명으로 추가해주면 됩니다
@RequestBody - HTTP 요청 몸체를 자바 객체로 변환하는데 사용됩니다
7. PostsApiControllerTest - 수정 기능 테스트
public class PostsApiControllerTest {
    //생략
    @Test
    public void 수정() throws Exception {
        //given
        Posts savedPosts = postsRepository.save(Posts.builder()
            .title("title")
            .content("content")
            .writer("writer")
            .build());

        Long updateId = savedPosts.getId();
        String expectedTitle = "title2";
        String expectedContent ="content2";

        PostsUpdateRequestDto requestDto = PostsUpdateRequestDto.builder()
                .title(expectedTitle)
                .content(expectedContent)
                .build();

        String url = "http://localhost:" + port + "/api/v1/posts/" + updateId;
        HttpEntity<PostsUpdateRequestDto> requestEntity = new HttpEntity<>(requestDto);

        //when
        ResponseEntity<Long> responseEntity = restTemplate.exchange(url, HttpMethod.PUT, requestEntity, Long.class);

        //then
        assertThat(responseEntity.getStatusCode()).isEqualTo(HttpStatus.OK);
        assertThat(responseEntity.getBody()).isGreaterThan(0L);
        List<Posts> all = postsRepository.findAll();
        assertThat(all.get(0).getTitle()).isEqualTo(expectedTitle);
        assertThat(all.get(0).getContent()).isEqualTo(expectedContent);

    }
}
HttpEntity - 이 클래스는 Http 프로토콜을 이용하는 통신의 header와 body 관련 정보를 저장할 수 있게 합니다. 그리고 이를 상속받은 클래스로 RequestEntity와 ResponseEntity가 존재합니다. 즉, 통신 메시지 관련 header와 body의 값들을 하나의 객체로 저장하는 것이 HttpEntity클래스 객체이고 Request 부분일 경우 HttpEntity를 상속받은 RequestEntity가,
Response 부분일 경우 HttpEntity를 상속받은 ResponseEntity가 하게 됩니다.
ResponseEntity - 헤더와 바디, 상태 코드로 구성되어 있고 http 응답을 나타낼 때 사용 합니다. Http 응답을 편하게 구성하여 보낼 때 사용 하는 클래스입니다
.exchange() - HTTP header를 수정할 수 있고, ResponseEntity를 반환 받습니다.
8. 조회 기능 테스트
조회기능은 톰캣에서 테스트 해보겠습니다.
application.properties에 다음 문장을 추가해주세요
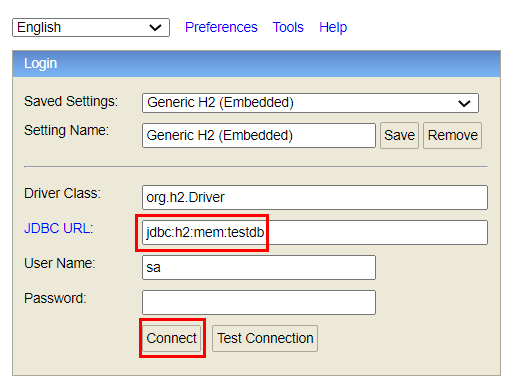
spring.h2.console.enabled=trueApplication의 main메소드를 실행하고 localhost:8080/h2-console에 접속합니다
다음과 같은 화면이 뜨면 JDBC URL을 입력한 후 connect 합니다
다음과 같이 sql문으로 데이터를 넣어줍니다

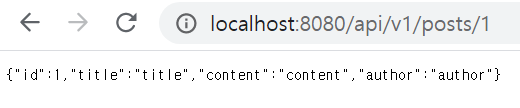
localhost:8080/api/v1/posts/1에 접속했을 때 다음과 같이 화면이 뜬다면 조회 기능이 성공적으로 된 것입니다!
'Back-end > Spring' 카테고리의 다른 글
| [SpringBoot] 1주차 스터디 (RestController) (0) | 2021.08.19 |
|---|---|
| [SpringBoot] Spring Data JPA로 게시판 만들기(5) - JPA Auditing으로 생성시간/수정시간 자동화 (0) | 2020.11.22 |
| [SpringBoot] Spring Data JPA로 게시판 만들기(3) - 등록 API (0) | 2020.11.16 |
| [SpringBoot] Spring Data JPA로 게시판 만들기(2) - repository테스트 코드 작성 (0) | 2020.11.16 |
| [SpringBoot] Spring Data JPA로 게시판 만들기(1) - domain, repository 생성 (0) | 2020.11.16 |